Thursday, March 24, 2016

Roasted Butternut Squash & Bacon Soup

Hi, I'm Melissa, and I have an addiction.

I'm addicted to roasting things.

It's true. I've spent the entire fall and winter playing "What can I roast next?" Because it is solid fact that every vegetable tastes better when it's tossed with the tiniest amount of oil, seasoned, and caramelized by roasting on high heat in the oven. Also works for meats and some fruits.

One of my other passions? Great soups. Especially the thick, hearty kind.


So when I saw a recipe for roasted butternut squash soup, it certainly caught my attention. 

And then... bacon.

Blended right into the soup. Smoky, bacony flavor in every bite. Because... bacon.

This is not a soup that requires 47 ingredients or multiple cooking techniques or even a lot of time. This is simplicity at its best.


These simple flavors, roasted and caramelized. It's irresistible, even if it's not strictly "soup weather." Which is good, since it is unseasonably warm for March. No matter. It's always time for bacon.

Roasted Butternut Squash and Bacon Soup
Adapted from damndelicious.net
Serves: 6

You'll need:
3 lb (roughly) of butternut squash 
1 onion
1 apple
4 strips of bacon
2 cloves of garlic
1/2 t dried thyme
salt & pepper
2 T olive oil
2 1/2 c chicken broth

Preheat the oven to 400 degrees while you prep your produce. Peel the squash, slice it, and cut into roughly 1-inch chunks.


If you're unfamiliar with butternut squash, you'll soon notice that the bulbous end has a mostly hollow interior with seeds and that goopy membrane stuff, similar to what you find in a pumpkin. Just like when you're making a jack-o-lantern, grab a spoon and scrape that stuff out.


Finish chopping the squash. Next, peel and core your apple, and cut into chunks of equal size to your squash.


Peel and roughly chop the onion. It is perfectly great if the layers stick together in a clump; individual pieces of onion would likely burn in the oven, so keeping these sections intact is actually helpful.


Finally, chop the raw bacon. I cut each strip into about 8 pieces. Don't dice it too finely, or it'll burn before the squash is cooked through.


Finally, mince your cloves of garlic, add the thyme, and salt and pepper to taste.


Drizzle the oil over everything and use your hands to mix thoroughly, making sure that everything is very lightly coated. Spread the mixture out in a single layer on two cookie sheets.


Roast everything for 25-30 minutes at 400 degrees, flipping with a spatula halfway through. Stab a few pieces of squash with a fork; if they're all soft, you're done.


Allow all that roasted deliciousness to cool for a few minutes, then transfer to the pitcher of a blender and add the chicken broth.


If you've got a big, powerful blender, you should be able to do the whole thing at once; if you have a smaller blender, start with half the roasted food and half the chicken broth and work in batches.

Puree everything until smooth.


Taste your soup and add salt and pepper, if necessary. You can also add more chicken broth to adjust the consistency. I like my soup very thick.


If you're eating the soup immediately, transfer to a saucepan to reheat.

Then serve up bowls of smoky, roasted fall flavor. (No matter what season it is.)


The original blogger recommends garnishing the soup with additional crisped and crumbled strips of bacon, as well as goat cheese and chives. Chopped up ham is great, because pork always calls for more pork. But my personal favorite? Feta cheese melting right into the soup.


Sunday, March 20, 2016

Buttercream Icing

This is the follow-up recipe to last week's chocolate buttercream icing. More real food, brought to you by a half-dozen ingredients and whipped together in about three minutes. 


This is no-fail, works-every-time, perfect-for-dying-and-frosting, eat-by-the-spoonful, real buttercream. 


You can dye the white frosting with traditional liquid drops to achieve beautiful pastel colors...


... or buy the food coloring gels for those intense primary colors.


Buttercream Decorating Icing
From: My mother-in-law, Carol
Makes: 3 c. (which is plenty to ice and decorate an entire cake. Carol also says that half a recipe will ice 24 cupcakes.)

You'll need:
1/2 c butter, softened
1/2 c shortening
1 t vanilla
1/8 t salt
1 lb (4 c) confectioner's (powdered) sugar
3 T milk

Cream the butter and shortening: beat them together on medium speed until well combined and fluffy. Add the vanilla and salt. Beat in the powdered sugar and milk and beat at high speed until the icing is light and fluffy.

And ta-da. Better living through real food. Now go eat your cake.


Friday, March 18, 2016

Oven Steak Fries

The word of the day: balance.


That is to say, the balance between using just enough fat on your potatoes that they're satisfying like traditional french fries, without the mess and hassle (and fat content) of deep-frying.

I have made some other oven-baked wedge fries in the past that were very "light," using only a little cooking spray and seasoning, and guess what? They tasted "light." Not satisfying.

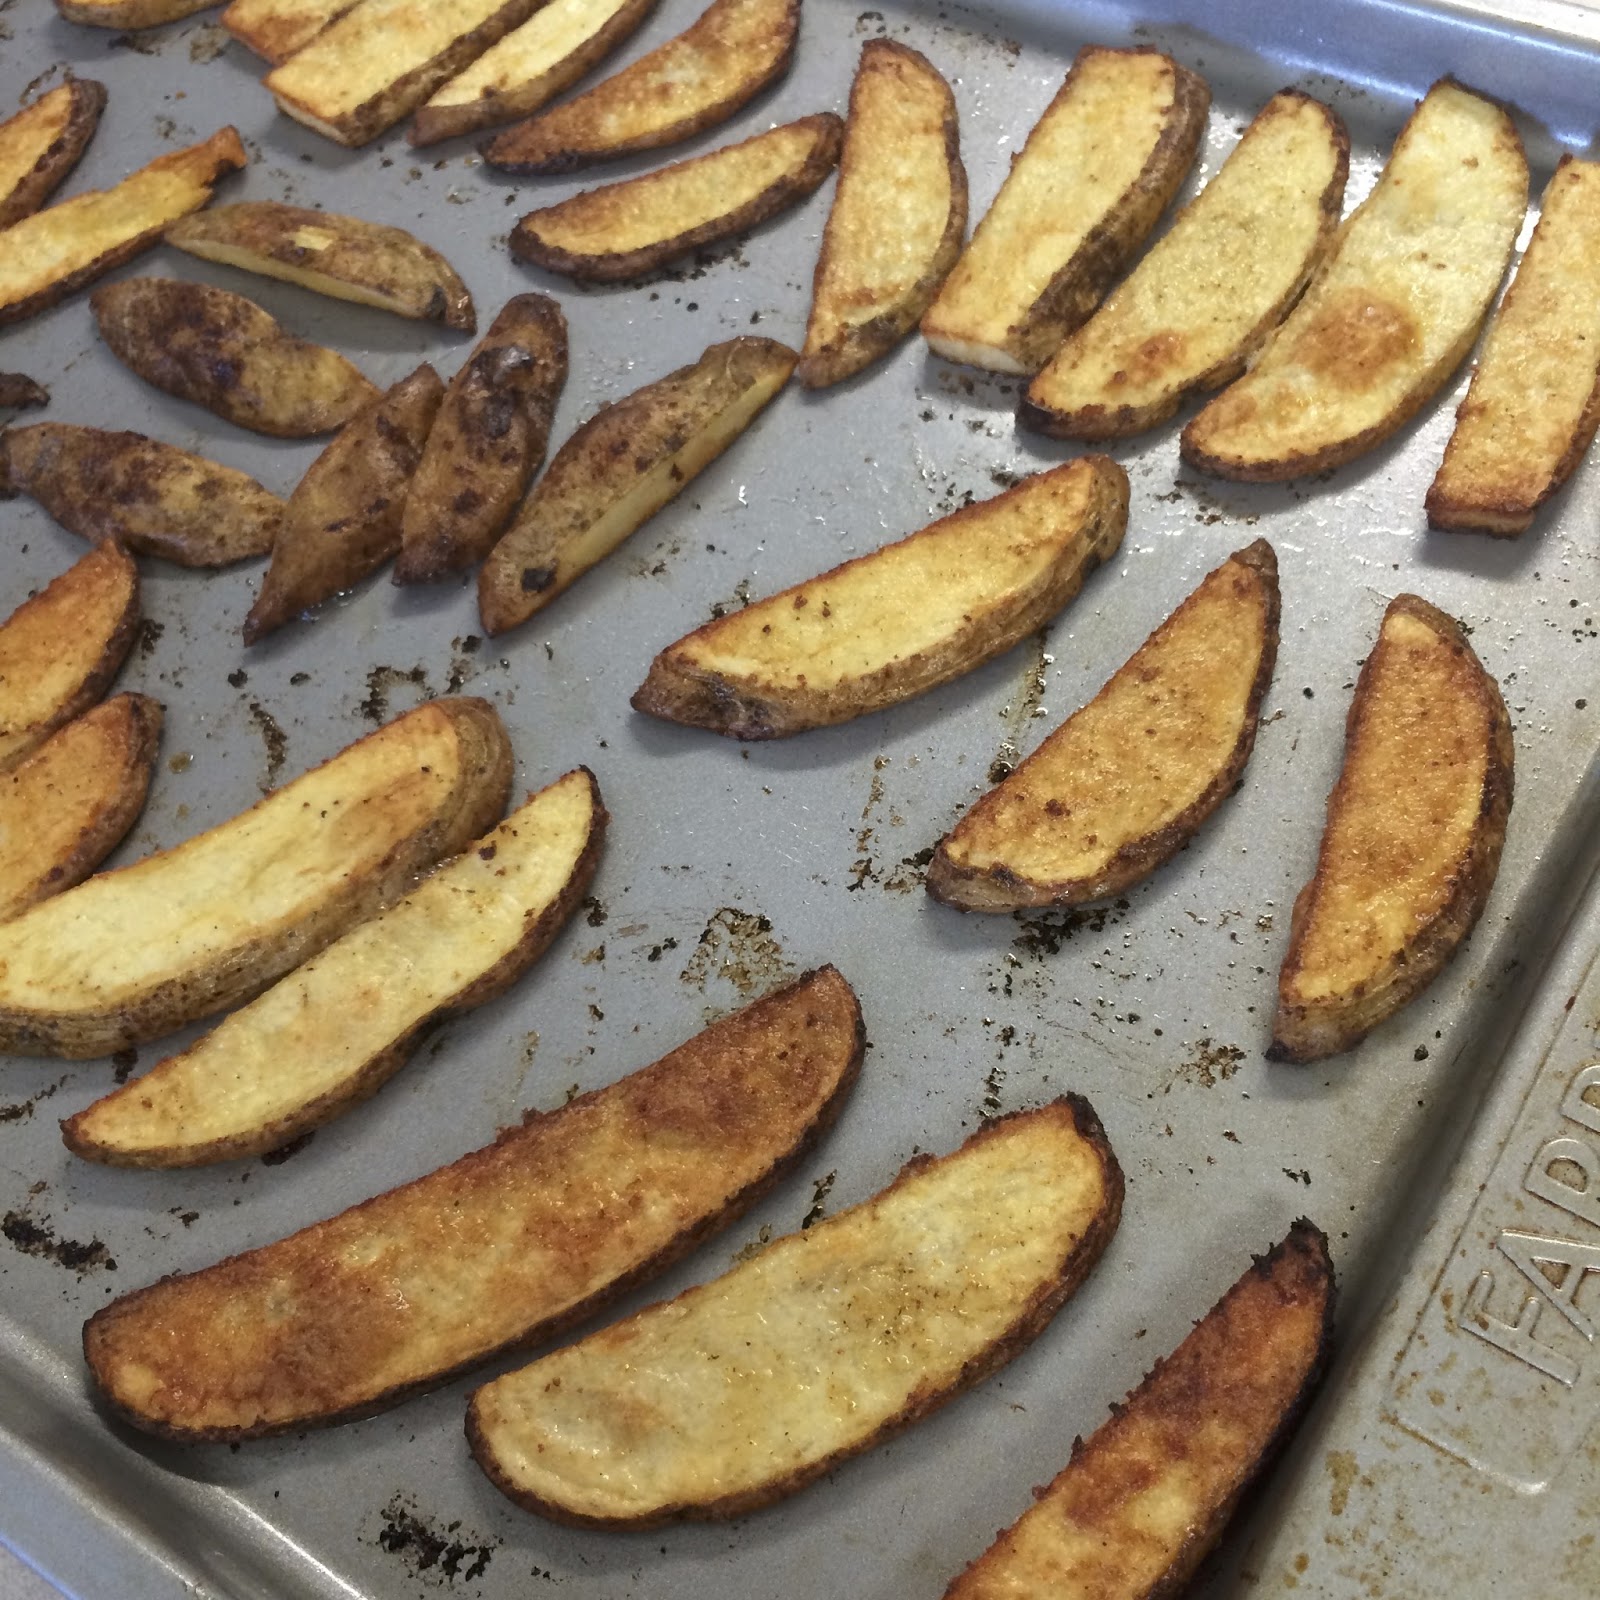
These beauties are basically just roasted potatoes, but when they're cut like steak fries, and seasoned like steak fries, and taste like steak fries...


I'd call that the perfect balance.

A little butter, a little oil. No deep frying. Just satisfying French fry flavor. Enjoy.

Bonus: They cook for less than 30 minutes... pretty fast for a potato dish!

Seasoned Oven Fries
From: Simple & Delicious Magazine
Serves: 4-6

You'll need:
6 medium baking potatoes (or more smaller ones)
2 T butter, melted
2 T canola or vegetable oil
1-2 t seasoned salt (I use Lawry's)


Preheat your oven to 450 degrees.

Cut each potato lengthwise in half, and then cut each half into 6-8 steak fries, about 1/4" thick.


Throw them all in a large bowl. Pour the melted butter and oil over the potatoes....


... and add the seasoned salt.


As with any type of roasted veggies, I like to use my hands to stir them up and make sure every piece is lightly coated. Then spread out your fries in a single layer on a cookie sheet or two. If your pans don't have a good nonstick finish, you may want to lightly grease them.


Bake for 12-14 minutes, until the bottom sides are just starting to get brown, and flip all the fries.


Bake for 10-12 minutes more, until they're all brown and crispy. Top with more seasoned salt, if you like, and serve with plenty of ketchup.


Wednesday, March 16, 2016

Buffalo Chicken Bites

Buffalo chicken (or anything else drenched in hot sauce) is one of my favorite food groups. When we lived out in Oklahoma, we frequented (and I mean FREQUENT) an AMAZING wing place that just happened to be about 35 paces from our church. And then... we moved. And have been unable to find a suitable wing joint. So, I have been forced to find a way to make boneless "wings" at home.

And I am not above deep-frying to get there.


Say hello to some saucy, spicy bites of goodness. This recipe is not for the faint-hearted (or weak-stomached, or particularly health-conscious). This will set your mouth almost on fire (think half a cup of hot sauce and a whole lot of cayenne pepper). But it's not spicy just for the sake of destroying tastebuds; this is both spicy and delicious. Works great as an appetizer for a party or game day or as an entree. This recipe is also easy to halve or double.


Buffalo Chicken Bites (aka Boneless "Wings")
Adapted from a blog that no longer exists.
Serves: 4 as an entree, 6-8 for appetizers

You'll need:
1/3 c flour
2 t  salt
2 t  cayenne pepper (yup)
1/2 t ground black pepper
4 trimmed boneless skinless chicken breasts
oil for frying (dependent on the size of your pan, about 1 cup)
4 T butter
1/2 c hot sauce

It is important that you use actual hot sauce for this recipe, not Buffalo sauce, not Tabasco: actual cayenne pepper sauce. In my opinion, this is the only kind worth buying: Frank's Red Hot Original. I wish they sold this stuff in larger bottles. Like by the half-gallon.


Heat about 1" of oil over medium-low heat in a large pan. I use my 12" sauté pan. Start heating the oil before you do anything else. If you do it correctly on a low heat setting (I use 3.5 out of 10 on my burner settings), it is going to take a while to heat. If you forget, you might be tempted to turn the heat up too high to heat the oil faster. The problem with that method is that oil goes from hot to burnt in about half a second, and anything you fry in burnt oil will just taste like burnt oil, no matter how good your seasoning is. And, please, please, please, BE CAREFUL when heating oil. I have a friend (who shall remain nameless) who had the fire department in her kitchen after she attempted to fry onion rings. So. Get the oil on, low and slow, and keep an eye on it.

In a shallow bowl, mix together the flour, salt, cayenne, and black pepper.


So much flavor, and we haven't even gotten to the hot sauce yet.

Cut up your chicken. I cut each chicken breast into 10-12 pieces. I like each piece to be about two bites. Try to cut them all the same: equal size = equal cooking time. Meaning, you don't risk the little ones getting overcooked or the big ones getting undercooked.


When the oil is ready... wait, how do you know when the oil is ready? Take one piece of chicken and press it into the breading mixture on all sides. Slowly begin to lower it into the oil. The oil should immediately begin to sizzle. If nothing happens immediately, your oil isn't hot enough. Take that piece out and wait a few more minutes OR turn it up about half a notch. If it begins to bubble and nearly explode, your oil is too hot, and you need to let it cool ASAP before it burns.

So once you've determined the oil is ready, press the chicken into the breading mixture one piece at a time to coat...


... and lower them carefully into the oil.


Fry about 3-4 minutes on that side.


Meanwhile, begin to melt the butter in a saucepan over medium heat.

Flip the chicken CAREFULLY with some tongs and fry 3-4 minutes more. If you're concerned about doneness, you can always pull out one of the bigger pieces and cut it open.

(Repeat in batches as necessary until all the chicken is done.)

Drain the chicken on paper towels and TURN OFF THE BURNER.


Your butter is probably melted by now. Pour in the hot sauce and whisk over heat until they're combined.


Now, the original recipe says to put the chicken in a bowl and toss with the sauce to coat. However, I'm not a huge fan of making extra dishes. Plus, the Husband reminded me how they coated the "wings" at our favorite place back in OK. So, here's my technique: Remove the sauce from heat, add all the pieces...


... put the lid on, and, carefully holding that lid on, shake it - shake it - shake it!


Voila. Nicely coated "wings."

Wait until your oil has cooled, then use a funnel to put it in something that seals tightly (like an empty spaghetti sauce jar) and throw it away.

In the meantime, serve up those Buffalo bites with some ranch dressing and/or blue cheese, carrots and/or celery, and a cold beverage. I like to serve ours with oven fries.


Tuesday, March 15, 2016

Baked Macaroni & Cheese


Recipes for macaroni and cheese are like moms: Almost everybody has one, they're all a little different, and they're almost all pretty great. I don't think I've ever had a bite of macaroni and thought, "Gosh, that's terrible." It's hard to irrevocably mess up pasta and gooey cheese. So I am making no claims that this recipe is the best macaroni in the world, that it will change your life, make you a better person, or get you a girlfriend. But here's what it will do: disappear. Because it is ooey-gooey baked cheesy wonderfulness. And who doesn't want that?


This particular macaroni recipe uses both Velveeta and cheddar cheeses, and a combination of boiling and baking. The secret ingredient? Wait for it - mayonnaise. "Wait, what?" Just give it a shot. The Husband does NOT. LIKE. MAYONNAISE. And he loves this macaroni & cheese. It does not takes like mayo. It just tastes like awesomeness.

Macaroni & Cheese 
Adapted from Great Grandma Esther
Serves: 2-3 (depending how aggressive your macaroni eaters are)

You'll need:
3/4 c uncooked elbow macaroni noodles
2 T mayonnaise (or Miracle Whip)
4 oz Velveeta (regular or low-fat), sliced thickly
1/4 c grated sharp or extra-sharp cheddar cheese

Boil the pasta according to the package directions and drain.


Transfer to a baking dish and stir in the mayo, until all the noodles are lightly coated.


Layer the slices of Velveeta over the noodles.


Microwave for 1 -2 minutes until the Velveeta is hot and starting to melt.


Stir it into the hot noodles. Mmm. I love that gooey, slurpy sound of cheesy pasta being stirred.


Sprinkle your grated cheese over the top.


Fun note: You can start making this early in the day, stop at this point, put the dish in the fridge, and then bake it later on. Whenever it's close to mealtime...

Cover your dish with a glass lid or foil and bake at 325 degrees for about 20-25 minutes, if you just made it, or 30-40 minutes if it was refrigerated. 


You know it's done when the edges just start to turn brown. That is my favorite part. 


When the family finishes dinner, clears their plates, and leaves the kitchen, you can find me scraping those browned bits of cheese up and feasting on them. Ssshh. They think I'm doing the dishes. 

And that's that. Easy cheesy macaroni.


For more fun, try topping it with hot sauce or shredded BBQ chicken.