Showing posts with label Chicken. Show all posts

Friday, April 1, 2016

Penne in Tomato Cream Sauce with Pan-Seared Chicken

Ever made a homemade pasta sauce? I hadn't, until I tried this one. It was so much easier than I thought it would be! And the first time I made this dish, the Husband, who is not a very verbally expressive person, stared at me and said, "This is good. Like, restaurant-quality-good."


That's what I call a win.


Ready to impress someone? Whip up this sauce in about 20 minutes with pantry staples.

Penne in Tomato Cream Sauce with Pan-Seared Chicken
Adapted from: This blog
Serves: 5-6

You'll need: 
boneless skinless chicken breast (about one fillet per person)
Montreal steak seasoning
12 oz penne pasta
2 T plus 2 t butter, divided
2 T plus 2 t olive oil, divided
2 cloves garlic, minced
1/2 c chicken broth
1 (8 oz) can tomato sauce (1 c)
1 c heavy cream
1/2-1 t EACH salt and pepper
1 T fresh chopped parsley OR 1 t dried parsley
6-8 fresh basil leaves, chopped OR 1 t dried basil

First, put a huge pot of water on to boil. Next, put the 2 tablespoons each of oil and butter into a wide saucepan and heat on medium.


Add the garlic and sauté for about a minute, stirring often. Be careful not to overheat your oil and burn your garlic! The garlic should be soft and translucent and fragrant, not brown.


Once the garlic is softened, stir in the chicken broth and bring to a simmer. Allow to reduce by half, stirring occasionally.


While that's reducing, put your chicken breasts between two pieces of plastic wrap and use the smooth side of a meat mallet to pound them to even thickness. Even thickness = even cooking. Plus, beating it with a mallet makes it nice and tender. Season both sides generously with the Montreal steak seasoning. (That stuff is AWESOME.)


Now. A word about cooking pasta. That large pot of water should be boiling by now. Before you dump in the pasta, add a GENEROUS amount of salt - at least a tablespoon or two. That salt does not make your pasta taste like salt; it makes is taste more like pasta. Next, dump in the pasta and and take note of the box instructions - and then cook it LESS than the box says by a minute or two. For instance, this box of penne said to cook for 11-12 minutes, so I cooked it for only 10. We want the pasta to be al dente - not quite finished - for a reason. And be sure to stir it once in a while!

While the pasta boils, it's time to cook the chicken. Melt the 2 teaspoons each of oil and butter in a large skillet over medium heat. Add the chicken and sear for about 5 minutes on each side until it's golden brown and cooked through.


Remove to a cutting board, cover with a pan lid or foil, and let it rest about 5 minutes before slicing.

Let's check on the sauce. It should be reduced down to about 1/4 cup by now. Stir in that tomato sauce...


... and then the cream.


Add the salt and pepper (I'd start at about 1/2 teaspoon each) and the herbs. Give it a taste and adjust the seasonings as necessary.


The pasta should be done by now. And by "done" I mean al dente, of course. Drain it very briefly...


... then add it right to the sauce.


Stir it around so the sauce coats the pasta and then - this is the crucial part - simmer the pasta in the sauce for another minute or two until it's fully cooked.


This is how you achieve pasta that soaks up and is completely coated by the sauce, rather than the sauce just sliding off the pasta.

While it's simmering, go ahead and slice up your chicken.


When the pasta is ready, you can stir in the chicken, or, for a fancier presentation, put the pasta on the plate first and lay the sliced chicken over the top.


Simple, right? And less than 30 minutes, start to finish, at least once you've done it a couple times. Prepare yourself for the compliments to roll in.


Tuesday, March 29, 2016

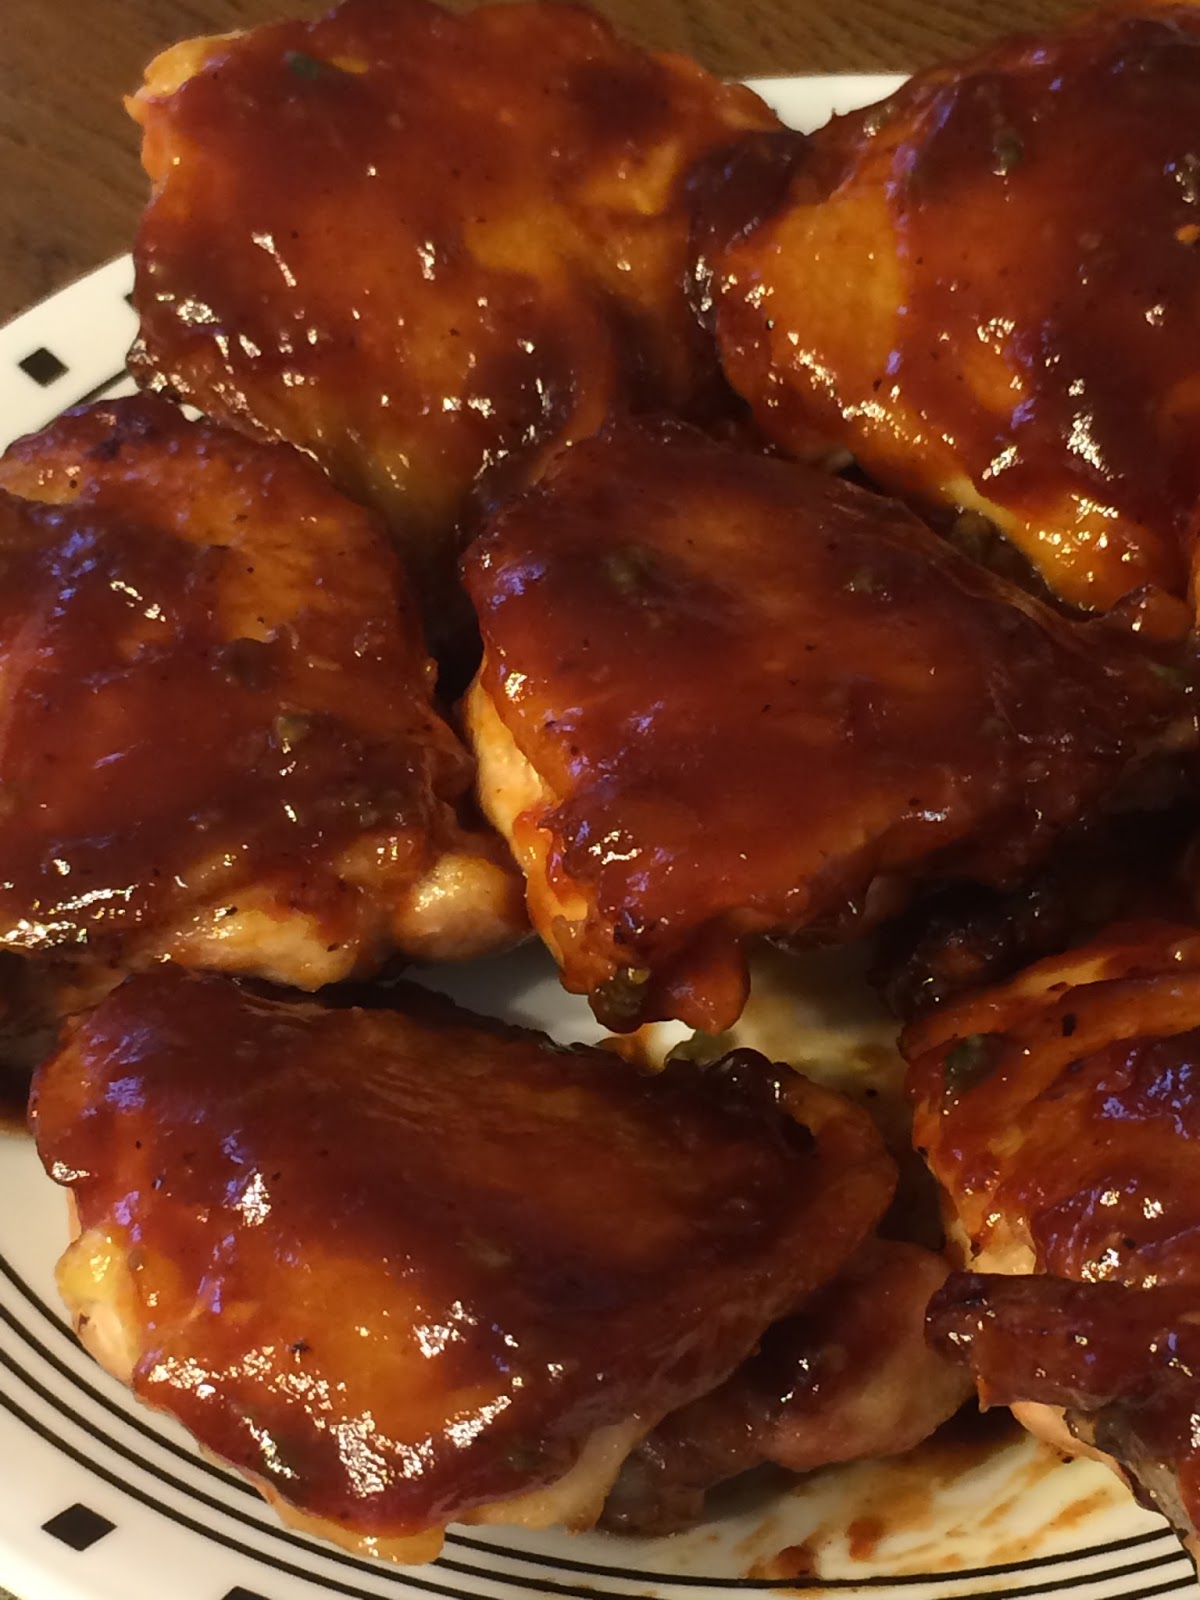
Oven-Barbecued Chicken Thighs

Is there anyone out there who is not a fan of barbecue? I mean, really. Juicy meats smothered in sweet, smoky, spicy sauce is something I could dive into any time, any day of the year. 


And with this easy indoor recipe, you don't have to wait until summer rolls around (or even own a grill). You can achieve that sticky glaze right in the kitchen with a sauce that starts as store-bought, but gets a little extra love.


Oven-Barbecued Chicken Thighs
Adapted from the Pioneer Woman
Serves: 8

You'll need:
8 chicken thighs, bone in, skin on
olive or vegetable oil
1 1/2 cups barbecue sauce
1/4 c apricot preserves
2 cloves garlic, minced
hot sauce, to taste (I used about 2 teaspoons... I like it spicy.)

Preheat the oven to 400 degrees. Brush a rimmed baking sheet very lightly with oil, and place the chicken thighs skin-side down on the prepared pan.


Roast at 400 degrees for 25 minutes.

While the chicken is roasting, let's make the sauce. Put the purchased BBQ sauce (we love Sweet Baby Ray's) in a small sauce pan, and add the apricot preserves...


... garlic, and hot sauce.


Mix thoroughly and bring the sauce to a simmer over medium-low heat. Cook for a few minutes to soften the garlic, then remove from heat.


After 25 minutes, remove the chicken thighs from the oven. I know... they are not very pretty yet. Rather homely little birds.


Let's give them a makeover.

First, brush the exposed sides of the thighs with a generous amount of your BBQ sauce. HINT: Since the chicken may not be fully cooked at this point, dipping your brush in the pot of sauce, brushing the chicken, and putting it back in the pot could cause the sauce to be contaminated. Now, all the sauce that's on the chicken will be cooked, so that's not a concern, but any leftover sauce would have to be thrown out. And who wants to do that? So, take some sauce out of the pan and put it into a second bowl. Brush your chicken from that bowl, refilling as needed. That way, anything left in the pot can be safely stored in the fridge for another use. Hooray for not wasting delicious things.

Picking up where we left off: Brush the bottoms of the chicken thighs.


Then, using a thin spatula, gently flip over all the thighs, being careful not to rip the skin. This is why we oiled the pan!


Now brush the tops with that sauce.


Starting to get prettier. Return the pan to the oven and roast for 7 more minutes. Then pull them out and brush on another generous layer of sauce.


Roast for 7 more minutes. Remove from the oven and turn the heat up to 425 degrees while you slather them with another layer of sauce.


So beautiful. Roast for 5 more minutes at 425 degrees.


And... GORGEOUS.


Serve with any and all country-cooking staples, like roasted veggies, cole slaw, cornbread, pasta salad, knives, forks, and possibly bibs.

Wednesday, March 16, 2016

Buffalo Chicken Bites

Buffalo chicken (or anything else drenched in hot sauce) is one of my favorite food groups. When we lived out in Oklahoma, we frequented (and I mean FREQUENT) an AMAZING wing place that just happened to be about 35 paces from our church. And then... we moved. And have been unable to find a suitable wing joint. So, I have been forced to find a way to make boneless "wings" at home.

And I am not above deep-frying to get there.


Say hello to some saucy, spicy bites of goodness. This recipe is not for the faint-hearted (or weak-stomached, or particularly health-conscious). This will set your mouth almost on fire (think half a cup of hot sauce and a whole lot of cayenne pepper). But it's not spicy just for the sake of destroying tastebuds; this is both spicy and delicious. Works great as an appetizer for a party or game day or as an entree. This recipe is also easy to halve or double.


Buffalo Chicken Bites (aka Boneless "Wings")
Adapted from a blog that no longer exists.
Serves: 4 as an entree, 6-8 for appetizers

You'll need:
1/3 c flour
2 t  salt
2 t  cayenne pepper (yup)
1/2 t ground black pepper
4 trimmed boneless skinless chicken breasts
oil for frying (dependent on the size of your pan, about 1 cup)
4 T butter
1/2 c hot sauce

It is important that you use actual hot sauce for this recipe, not Buffalo sauce, not Tabasco: actual cayenne pepper sauce. In my opinion, this is the only kind worth buying: Frank's Red Hot Original. I wish they sold this stuff in larger bottles. Like by the half-gallon.


Heat about 1" of oil over medium-low heat in a large pan. I use my 12" sauté pan. Start heating the oil before you do anything else. If you do it correctly on a low heat setting (I use 3.5 out of 10 on my burner settings), it is going to take a while to heat. If you forget, you might be tempted to turn the heat up too high to heat the oil faster. The problem with that method is that oil goes from hot to burnt in about half a second, and anything you fry in burnt oil will just taste like burnt oil, no matter how good your seasoning is. And, please, please, please, BE CAREFUL when heating oil. I have a friend (who shall remain nameless) who had the fire department in her kitchen after she attempted to fry onion rings. So. Get the oil on, low and slow, and keep an eye on it.

In a shallow bowl, mix together the flour, salt, cayenne, and black pepper.


So much flavor, and we haven't even gotten to the hot sauce yet.

Cut up your chicken. I cut each chicken breast into 10-12 pieces. I like each piece to be about two bites. Try to cut them all the same: equal size = equal cooking time. Meaning, you don't risk the little ones getting overcooked or the big ones getting undercooked.


When the oil is ready... wait, how do you know when the oil is ready? Take one piece of chicken and press it into the breading mixture on all sides. Slowly begin to lower it into the oil. The oil should immediately begin to sizzle. If nothing happens immediately, your oil isn't hot enough. Take that piece out and wait a few more minutes OR turn it up about half a notch. If it begins to bubble and nearly explode, your oil is too hot, and you need to let it cool ASAP before it burns.

So once you've determined the oil is ready, press the chicken into the breading mixture one piece at a time to coat...


... and lower them carefully into the oil.


Fry about 3-4 minutes on that side.


Meanwhile, begin to melt the butter in a saucepan over medium heat.

Flip the chicken CAREFULLY with some tongs and fry 3-4 minutes more. If you're concerned about doneness, you can always pull out one of the bigger pieces and cut it open.

(Repeat in batches as necessary until all the chicken is done.)

Drain the chicken on paper towels and TURN OFF THE BURNER.


Your butter is probably melted by now. Pour in the hot sauce and whisk over heat until they're combined.


Now, the original recipe says to put the chicken in a bowl and toss with the sauce to coat. However, I'm not a huge fan of making extra dishes. Plus, the Husband reminded me how they coated the "wings" at our favorite place back in OK. So, here's my technique: Remove the sauce from heat, add all the pieces...


... put the lid on, and, carefully holding that lid on, shake it - shake it - shake it!


Voila. Nicely coated "wings."

Wait until your oil has cooled, then use a funnel to put it in something that seals tightly (like an empty spaghetti sauce jar) and throw it away.

In the meantime, serve up those Buffalo bites with some ranch dressing and/or blue cheese, carrots and/or celery, and a cold beverage. I like to serve ours with oven fries.


Tuesday, March 8, 2016

Cornflake Chicken Strips

Who doesn't love chicken fingers? As soon as kids are old enough to chew, it tends to be a favorite, and a classic that adults love to come back to. 


Of course, the best ones are the ones that just came out of a deep fryer, but in the interests of not frying something at every meal (as tempting as it is), I went looking for a nice crunchy baked alternative. Bread crumbs just do not get crispy in the oven. The laws of physics just won't allow it to happen. Corn flakes, however, have a nice crunch to them, especially when drizzled with a smidgeon of oil, and they have great flavor to boot.


This recipe is easy to scale up or down to feed just a couple of people or a crowd. Just don't crowd your baking sheet so they stay nice and crunchy!

Cornflake Chicken Strips
Adapted from food.com
Serves 4

You'll need:
2 1/2 cups cornflake crumbs (this is important: measure AFTER they're crushed!)
1/4 c flour
1/2 t seasoning salt, like Lawry's
1/4 t pepper
1 egg
1/2 T water
4 chicken breast fillets, cut crosswise into about 1" strips
olive oil

Preheat the oven to 400 degrees. Finely crush the cornflakes (I like to use a plastic bag and a rolling pin), then measure them, and combine with the flour, seasoning salt, and pepper.


In a separate bowl, beat the egg and water. Set up your breading station.


Dip each chicken strip in the egg, then dredge in the cornflake mixture, pressing firmly to make the crumbs adhere. Place the strips on a baking sheet.


Yes, I could have done a better job crushing my cornflakes. I'm impatient.

Drizzle a tiny amount of olive oil on each strip (a few big drops on each one will do it).


Bake for 20-30 minutes, depending on the size of your strips. I'd recommend starting at 20 and check for doneness; you don't want to bake these to death or they will be dry, dry, dry.


And there you go. Wasn't that easy? Serve with mashed potatoes and barbecue sauce, or sliced on a salad with honey mustard, or toss with hot sauce and dip in ranch dressing... Be creative.