Showing posts with label 5 Ingredients or Less. Show all posts

Thursday, May 19, 2016

Bagels

This is my new favorite thing.

Okay, let's be honest: I have a lot of favorite things, and most of them are food (or drink). But making bagels really is one of my favorites.


They're just plain fun to make. Oh, and the fact that they make your house smell like a bakery?


Get outta here.

Why, someone may ask, would a person go through the trouble of making bagels when one could simply buy them at the store? (Besides the fact that it's fun!) Yes, it takes a little time and effort. So here's the rationale (this may sound familiar):

1. No unpronounceable ingredients, no preservatives. Just real food.

2. BIG cost savings. Buying 12 bagels at the grocery store can easily run upwards of $6, and forget about bakery-fresh ones. But making them yourself? You can make a dozen for - wait for it - less than $1.

Yes. I did the math. $1.

(Cream cheese not included.)

3. They taste Uh. May. Zing.

So, in summary, real food that tastes better and costs less. Who would say no to that?

Bagels
Adapted from here and here
Yield: 8 to 12 bagels
Total time: about 3 hours

For the dough, you'll need:
1 1/2 c warm water
1 T dry active yeast
1 T brown sugar
2 T honey
2 t salt
4 c flour


For the water bath, you'll need:
about 1 qt water
2 T brown sugar
1 T sugar

For topping you'll need:
1 egg white
1 T water
cinnamon sugar, coarse salt, poppy seeds, etc. for optional toppings

Put the 1 1/2 cups warm water in the bowl of a stand mixer and sprinkle the yeast on top. Let it stand for 2-3 minutes so the yeast can bloom. Next, add the brown sugar, honey, salt, and flour. Using the dough hook attachment, mix on low for a minute or two until well mixed.


Pause, scrape the sides with a spatula, and then turn the mixer on medium-low and allow it to knead the dough for 10 minutes. The dough will be sticky but smooth and elastic.

(Note: If you don't have a stand mixer, you can easily do the first phase of the mixing with a sturdy hand mixer on low speed, transfer the dough to a floured surface, and knead it by hand. However... Oy, what a workout!)


Oil (or spray with nonstick cooking spray) a large bowl. Place the dough in the bowl, turning once to coat the dough with oil. Cover with a towel and allow the dough to rise for an hour and a half (90 minutes).


The dough should double in size.


Turn the dough out onto a floured surface and divide it into 8 to 12 pieces. Decide what you want to end up with: 12 smallish bagels, 10 medium bagels, or 8 large bagels. Just try to make them all the same size so they'll bake evenly. Form each piece into a ball. I do this by folding all the corners underneath and pinching them together.


Space the dough balls out on the floured surface (they're going to rise some more) and cover with a towel for about 30 more minutes. These...


... will now look like this.


During that time, prepare the water bath by placing the water, sugar, and brown sugar in a large, wide sauté pan, sauce pan, or wok and bring it to a steady simmer.


During this time, you should also prepare your baking sheets by laying parchment paper on them or lightly greasing them. If you're making 8 bagels, you may be able to crowd them onto one baking sheet, but for any more, spread them out over two sheets. Preheat the oven to 400 degrees.

When the 30 minutes are up and your water is simmering, it's time to shape bagels. Flour your fingers and then gently poke a hole in the middle of the dough. Without crushing the dough, gently pull the dough outward to stretch the hole to about 1.5-2 inches in diameter.


Then place it gently in the water bath. (Please don't splash yourself with hot water.) Add another bagel or two to the water bath (whatever will fit in your pan) and simmer for about 2 minutes.


The bagels should puff up a bit. Flip them over gently (don't splash!) and simmer about 1 more minute.


Remove the bagels to your prepared baking sheets, and repeat with the rest of you bagels, working in batches.


Finally, beat together the egg white and water and brush lightly over the bagels. Then sprinkle them with any toppings you wish, like poppy seeds or cinnamon sugar.


At last: time to bake! If you made 10-12 smaller bagels, bake them for 18-22 minutes; for larger bagels, add 3-4 minutes. If your oven has hot spots, be sure to rotate the pans so you don't burn the bottoms.


And now that your house smells like a New York bagel shop, I double dare you not to immediately rip into one of these. But seriously, cool them on racks for at least 5 minutes before slicing.


Store in a sealed container at room temperature for up to a week, or slice, seal in something airtight, and freeze. (None of ours have ever made it to the freezer.)


The Bug says... "Mmm... Bay-bels!"


Tuesday, May 10, 2016

Oven-Braised & Grilled BBQ Pork Ribs

'Tis the season to fire up the grill. At least, it is where we live, because we've already broken 80 degrees a couple of times. And regardless of what month it is, hot weather calls for cold beer and cooking outdoors.


And pork.

Because, well, pork goes with everything, every time.


Who's up for some melt-in-your-mouth, tender, falling-apart, crispy-BBQ-edges porky goodness?

Start to finish, these ribs take about 4 hours, but there's only about 25 minutes of actually paying attention to them. If you're not home during the day, these are perfect for a relaxing weekend. Start them early in the afternoon, forget about them for a few hours, and then spend about 20 minutes at dinnertime putting on the finishing touches. How easy is that?

Oven-Braised BBQ Pork Ribs
Technique taught to me by my friend, Chrissy, and adapted by the Husband and me
Serves: As many or as few as you like

You'll need:
Country style pork ribs (boneless or bone-in is a matter of preference... I prefer bone-in)
Your favorite barbecue sauce
A grill
A grill top pan designed for grilling fish, veggies, and other delicate or small foods
A basting brush

About three and a half hours before dinnertime, preheat the oven to 350 degrees. Place your pork ribs into an appropriately sized casserole dish.


Add water to the dish, until the ribs are at least halfway submerged.


See the water line?

Cover the pan with foil and bake at 350 degrees for about 3 hours... during which time, your house will absolutely smell like pork heaven.


(Since the oven is already on, this is a great day to make some baked or twice-baked potatoes.)

When the three hours are up, carefully remove the pan from the oven and remove the foil. Get a trash bag for the bones and excess fat and a plate for the ribs, and grab some tongs and get to work.


First, pull out the bones and any clumps of fat. After three hours braising, the meat literally falls off the bones.


You'll also notice as you try to grab the meat with the tongs that it will completely fall apart.


Seriously. Give it a gentle squeeze and see what happens.

Now, some people like to leave the meat in bigger chunks for easier grilling. However, this is where the grill pan comes in. The Husband and I are in agreement that lots of smaller pieces means you can get more barbecue sauce to adhere to the pork, so that's a win. And with the grill pan, you don't have to worry about tiny pieces falling into your grill and going to waste. SO, decide how much you want to tear up your pork, and collect it on a plate.


Oh, and I dare you not to sneak bites during this process.

Helpful hint: PLEASE don't destroy your sink drain by trying to put all that fatty, greasy water down the drain. Even if you have a garbage disposal, that's not a good idea. I put the pan way back in the corner of the counter and let it cool until dinner is over, so that most of the fat solidifies on the top. Then you can skim most of it off, throw it in the trash, and carefully pour the rest down the disposal with LOTS of cold water.

Back the the pork.

Turn the grill on high, and get out the barbecue sauce. At our house, Sweet Baby Ray's is the boss, and we buy it by the jug.


See? I wasn't exaggerating.

Spread out all the pork on the grill pan and slather it with a generous layer of sauce.


The Husband usually does this first coat on the kitchen counter with the grill pan resting on a cookie sheet. Then take it outside, lift the grill pan onto the hot grill, and close the grill. Cook on high for about 15 minutes. During that time, flip the pieces of pork over and baste with more sauce 3 or 4 or 4 times. (So we're flipping and basting every 4-5 minutes.) Don't leave your pork on the grill too long; we don't want to dry it out, just get that sauce caramelized on the outside.

And there it is. Your pile of melt-in-your-mouth, spicy, saucy, smoky, pork.


Try not to drool.

Tuesday, March 29, 2016

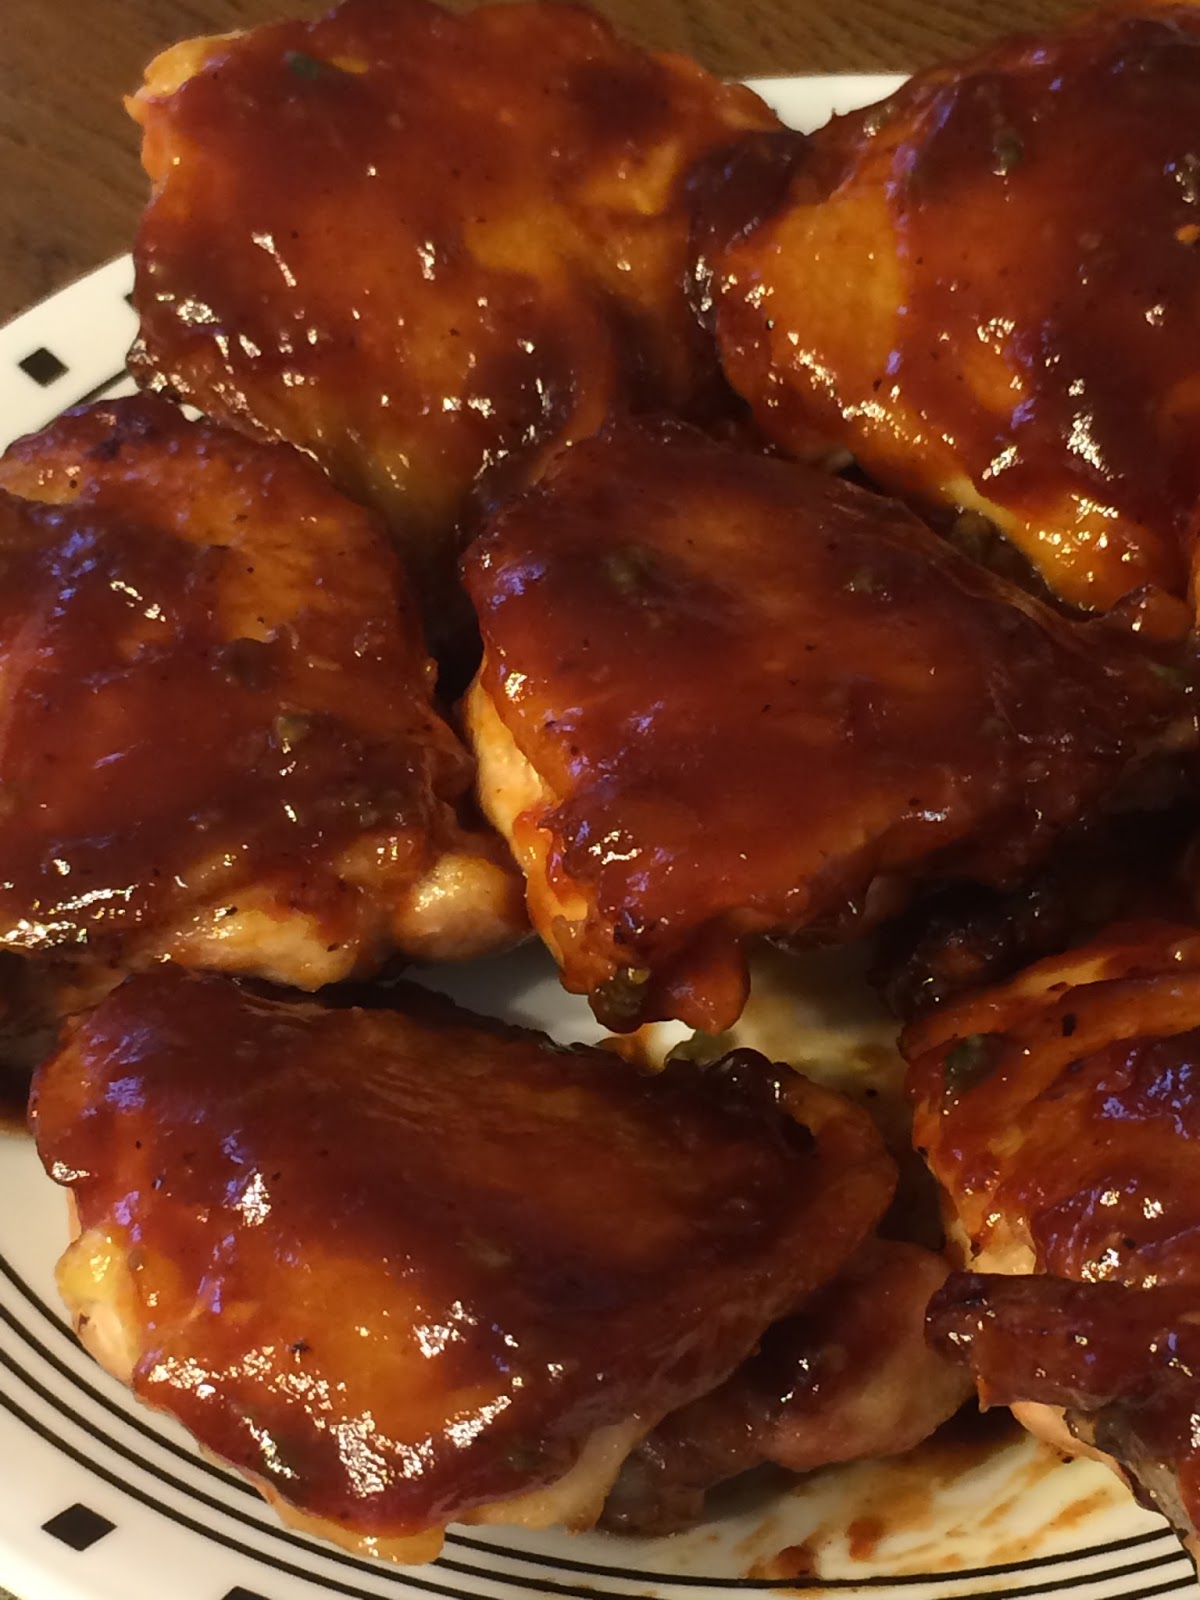
Oven-Barbecued Chicken Thighs

Is there anyone out there who is not a fan of barbecue? I mean, really. Juicy meats smothered in sweet, smoky, spicy sauce is something I could dive into any time, any day of the year. 


And with this easy indoor recipe, you don't have to wait until summer rolls around (or even own a grill). You can achieve that sticky glaze right in the kitchen with a sauce that starts as store-bought, but gets a little extra love.


Oven-Barbecued Chicken Thighs
Adapted from the Pioneer Woman
Serves: 8

You'll need:
8 chicken thighs, bone in, skin on
olive or vegetable oil
1 1/2 cups barbecue sauce
1/4 c apricot preserves
2 cloves garlic, minced
hot sauce, to taste (I used about 2 teaspoons... I like it spicy.)

Preheat the oven to 400 degrees. Brush a rimmed baking sheet very lightly with oil, and place the chicken thighs skin-side down on the prepared pan.


Roast at 400 degrees for 25 minutes.

While the chicken is roasting, let's make the sauce. Put the purchased BBQ sauce (we love Sweet Baby Ray's) in a small sauce pan, and add the apricot preserves...


... garlic, and hot sauce.


Mix thoroughly and bring the sauce to a simmer over medium-low heat. Cook for a few minutes to soften the garlic, then remove from heat.


After 25 minutes, remove the chicken thighs from the oven. I know... they are not very pretty yet. Rather homely little birds.


Let's give them a makeover.

First, brush the exposed sides of the thighs with a generous amount of your BBQ sauce. HINT: Since the chicken may not be fully cooked at this point, dipping your brush in the pot of sauce, brushing the chicken, and putting it back in the pot could cause the sauce to be contaminated. Now, all the sauce that's on the chicken will be cooked, so that's not a concern, but any leftover sauce would have to be thrown out. And who wants to do that? So, take some sauce out of the pan and put it into a second bowl. Brush your chicken from that bowl, refilling as needed. That way, anything left in the pot can be safely stored in the fridge for another use. Hooray for not wasting delicious things.

Picking up where we left off: Brush the bottoms of the chicken thighs.


Then, using a thin spatula, gently flip over all the thighs, being careful not to rip the skin. This is why we oiled the pan!


Now brush the tops with that sauce.


Starting to get prettier. Return the pan to the oven and roast for 7 more minutes. Then pull them out and brush on another generous layer of sauce.


Roast for 7 more minutes. Remove from the oven and turn the heat up to 425 degrees while you slather them with another layer of sauce.


So beautiful. Roast for 5 more minutes at 425 degrees.


And... GORGEOUS.


Serve with any and all country-cooking staples, like roasted veggies, cole slaw, cornbread, pasta salad, knives, forks, and possibly bibs.

Sunday, March 20, 2016

Buttercream Icing

This is the follow-up recipe to last week's chocolate buttercream icing. More real food, brought to you by a half-dozen ingredients and whipped together in about three minutes. 


This is no-fail, works-every-time, perfect-for-dying-and-frosting, eat-by-the-spoonful, real buttercream. 


You can dye the white frosting with traditional liquid drops to achieve beautiful pastel colors...


... or buy the food coloring gels for those intense primary colors.


Buttercream Decorating Icing
From: My mother-in-law, Carol
Makes: 3 c. (which is plenty to ice and decorate an entire cake. Carol also says that half a recipe will ice 24 cupcakes.)

You'll need:
1/2 c butter, softened
1/2 c shortening
1 t vanilla
1/8 t salt
1 lb (4 c) confectioner's (powdered) sugar
3 T milk

Cream the butter and shortening: beat them together on medium speed until well combined and fluffy. Add the vanilla and salt. Beat in the powdered sugar and milk and beat at high speed until the icing is light and fluffy.

And ta-da. Better living through real food. Now go eat your cake.