Thursday, April 28, 2016

Better Than Shake 'N Bake Breaded Pork Chops

Ah, pork. The other white meat. That versatile and flavorful protein. What's better than a classic oven-baked breaded pork chop just like mom used to make, with that bag full of breading from the prepared foods aisle?


I can tell you what's better: making your OWN breading.


Once again, making it yourself vs. buying a pre-made mix saves you a bunch of money AND delivers WAY. MORE. FLAVOR. Why pay four times as much for someone else to stir together your flour and spices? Trust me, the flavor here is more than worth the, oh, two extra minutes that it'll take you to prepare it.

The recipe is for the breading, which can be used on any type of pork chops (thin cut, thick cut, bone-in, boneless, sliced pork loin...) and can be easily scaled up or down to make more or fewer chops.

Better Than Shake 'N Bake Breaded Pork Chops
From: My mother-in-law, Carol
Makes enough breading for 4-5 thin or boneless pork chops OR 3-4 thick cut or bone-in chops

You'll need:
1/4 c yellow cornmeal
1/4 c flour
2 t dried sage
1 t salt
1 t sugar
1 t paprika
about 1/4 c milk
(and, of course, pork chops)

So simple, right?


First, preheat your oven to 425 degrees. Second, trim any excess fat off your pork chops. Next, measure the cornmeal, flour, sage, salt, sugar, and paprika into a gallon-size plastic bag.


Hold the top closed and shake to mix.


Pour your milk into a shallow bowl and set up your breading station: chops, milk, bag of breading mix, and an appropriately sized baking dish that's lightly coated with nonstick cooking spray.


Taking one pork chop at a time, dip it in the milk, wetting every side...


... and drop into the bag, and (holding the top of the bag closed) shake, shake, shake!

Pull the chop out, place it on the baking dish, and repeat with the remaining chops.


Look how perfectly the coating adheres.


Bake at 425 degrees for about 20-25 minutes. Note: If you use thick-cut, thin-cut, or other abnormally sized chops, please adjust your cooking time.


(Those black spots? I use bone-in chops so sometimes the bone gets discolored in the oven. Don't worry. I wasn't planning to eat the bone anyway.)

And there you have it. Better flavor that only costs you about 1-2 more minutes than the store-bought stuff, and saves money in the process.


I love to serve them with green beans, applesauce, and baking powder biscuits.


Tuesday, April 26, 2016

Chili-Lime Steak Quesadillas

I really, really, really love Mexican food. From chimichangas to quesadillas to burritos and tacos and nachos and margaritas and guacamole and... you get the picture. And as I've mentioned before, I really love steak. And I also love saving money. And I am not going to spend $10 per pound for sirloin only to chop it up and throw it in a tortilla. So I devised this recipe to utilize a cheaper cut of steak and keep it nice and tender.


And, of course, to taste awesome.

Steak Quesadillas

For the marinade, you'll need:
You'll need:
1/4 c lime juice
6 garlic cloves, minced
4 t canola oil
1 T chili powder
1 t ground chipotle powder
1 t cumin
1 t salt
1 t pepper
1/2 t onion powder
1.5-2 lb steak, such as blade steak or top round steak

This method uses three techniques to maximize the tenderness of the meat. First, place the large cut of steak between two layers of wax paper and pound it with a meat tenderizer mallet.

INSERT ROTATED PICTURE

Secondly, cut the steak into thin strips against the grain. If you're having trouble finding the grain, gently pull and stretch the steak in different directions. You'll be able to see the muscle tissues running parallel lines. Cut perpendicular to those lines. (Geography refresher, anyone?)

INSERT TWO ROTATED PICTURES

Finally, marinate the steak in acid. Like lime juice. Aside from tasting great, the acid in the lime juice helps break down the connective tissue in the meat, making it more tender. So, combine all these amazing flavors in a quart-sized resealable bag...


... and add the steak. Seal the bag and knead it to spread that marinade around. Put it in the fridge for at least 4 hours, turning once or twice.


When dinnertime rolls around, heat a skillet over medium heat and drop in the steak, working in batches if necessary, and cook for just a few minutes, stirring occasionally.


Overcooking the meat will undo all that tenderizing we did earlier, so please, please... don't overcook your steak. Less than five minutes should do it.

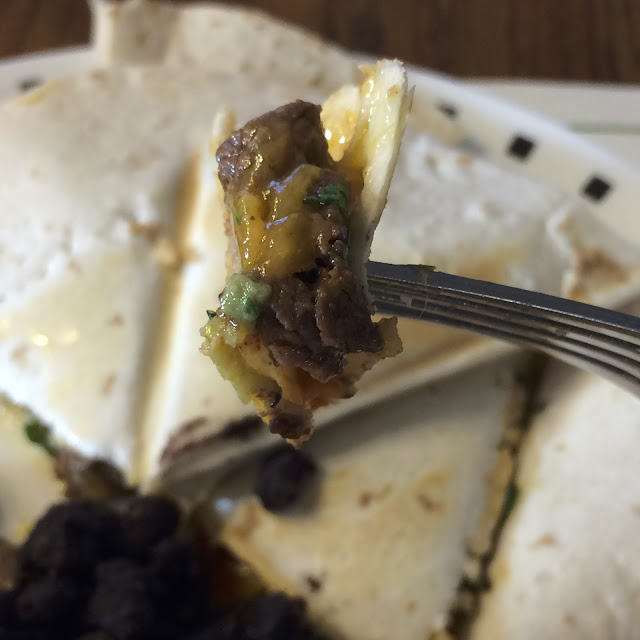
Then simply pile the steak inside a flour tortilla, along with plenty of cheese and any other toppings you like, such as sautéed veggies, cilantro, etc. Heat it in a quesadilla maker or a skillet until the tortilla is golden and the cheese is melted. Serve with beans, rice, sour cream, guacamole, salsa, chips, margaritas...


Sunday, April 17, 2016

Roasted Pork Loin with Pan Sauce

I said a couple of weeks ago that every good meat deserves a good sauce. Well, this recipe goes above and beyond: this is a juicy, tender piece of pork with a great - and I mean GREAT - sauce.


This would be the reason why.


This right here is called FLAVOR.

Spend a few minutes around lunch time (or earlier if necessary) throwing together a marinade, and the rest of this dish comes together in about 45 minutes. And if you're having company, making a double recipe won't cost you any extra time (and will probably impress!).

Roasted Pork Loin with Pan Sauce
Adapted from this blog
Serves 3-4

For the marinade, you'll need:
1/4 c olive oil
3 T soy sauce
3 T red wine vinegar
1 1/2 T lemon juice
1 T Worcestershire sauce
1 T fresh parsley, chopped
1 t dry mustard
black pepper
2 cloves garlic, minced
1 1-lb pork tenderloin, silverskin removed

For the sauce, you'll need:
1/4 c reserved marinade
1/2 c chicken broth
1-2 t butter

Earlier in the day, combine all marinade ingredients.


Reserve about 1/4 cup of the marinade and store in fridge. Place the pork in resealable plastic bag with the remaining marinade and marinate in the fridge for at least 3 hours.


About 45 minutes before dinnertime, preheat the oven to 425 degrees. Heat a dry skillet over medium-high heat and then place the tenderloin in the pan.


Do NOT pour in the excess marinade; we want to sear the meat, not steam it. Allow the meat to cook, undisturbed, for 2-3 minutes on each side.


The goal is not to cook the meat all the way through, but rather to create a crust on the outside of the tenderloin that will hold all the juices in the meat while it roasts in the oven.

When each side is seared, place the tenderloin in a shallow baking dish and roast in the oven for about 25-30 minutes, until the meat reaches 145 degrees. Cover the plan loosely with foil and let the meat rest at least five minutes before slicing.

Meanwhile, when the pork is almost done in the oven, place the same skillet back on medium heat. Add the chicken broth and use the back side of a spatula to scrape up the browned pieces of pork.


Add the reserved marinade and bring it to a boil. Reduce the heat to medium-low and simmer for 5-7 minutes until the sauce is reduced by about a third.


While the sauce is reducing, go ahead and slice that pork. Slightly pink inside = tender and perfect.


Finally, add a pat or two of butter to the sauce and remove it from the heat.


Stir in the butter. Pour some of the sauce over the sliced tenderloin and serve additional sauce on the side.


Seriously. That SAUCE.


Make sure to serve it with something to soak up that sauce, like crusty bread, roasted potatoes, mashed potatoes, risotto... You get the idea.

SAUCE!


Tuesday, April 12, 2016

Mocha Sheet Cake with Cappuccino Buttercream

In case anyone wasn't aware: I love coffee. I mean, I LOVE it. I drink it day in, day out. Yes, it's partially a minor caffeine addiction... But I just really, really love it. The smell as it brews... the happy sound of the coffee maker... and of course, that delicious flavor. Yep, I love coffee.

And of course, I love cake. Because who doesn't love cake? 

So when I found a recipe for cake made with coffee - not to be confused with coffee cake, which is a separate, wonderful thing - but actual cake with actual coffee in the batter,  I knew I would love it.

But here's the truly wonderful part: this is a cake that appeals to even non-coffee drinkers. You know, those bizarre people who are in denial about coffee's unmistakable appeal. Like The Husband. He does not like coffee. Never has. And yet, he loves this cake. So, I can reassure all you (strange) non-coffee people out there: This cake is even for you.


This is a perfect casual dessert for feeding company or taking to a pitch-in... anywhere you're feeding a crowd. Because this is a total crowd-pleaser. (See what I did there?)


Mocha Sheet Cake with Cappuccino Buttercream
From Country Living magazine, 2009
Makes: 15x10" cake

For the cake, you'll need:
1 c butter
1 c strong brewed coffee
1/2 c unsweetened cocoa powder
2 c flour
2 c sugar
1/2 t salt
1/2 c sour cream
2 eggs
1 t baking soda
1 t vanilla extract

For the frosting, you'll need:
5 T butter, softened
1 lb (4 c) powdered sugar
3 T strong brewed coffee, room temperature
1 T milk
1 t vanilla extract
shaved chocolate, chopped semisweet chips, or miniature semisweet chips, for garnish

We start with two of my favorite activities: softening butter and brewing coffee.


Set out 2 sticks plus 5 tablespoons, and brew at least a couple cups of coffee (so you can enjoy some too, of course). Set aside 3 tablespoons to cool, measure 1 additional cup, and drink the rest.


Preheat the oven to 375 degrees. Pour the 1 cup of coffee into a medium saucepan* and add the two sticks of butter (they don't really have to be soft) and the cocoa powder.

*Use medium or large, and it's best if it does NOT have a nonstick finish, since we're going to use an electric mixer in just a minute.


Over medium heat, melt the butter and bring the whole mixture to a boil, whisking occasionally.


Once it's reached a boil and fully mixed, remove from heat and stir in the flour, sugar, and salt.


Get out your electric mixer and beat the batter on medium speed for about a minute.


Add the sour cream, baking soda, eggs, and vanilla...


... and beat on medium for about 1 minute longer. Pour into a 15 x 10 x 1" pan (or similar) that has been lightly sprayed with nonstick cooking spray.


Bake at 375 degrees for 23-25 minutes, until a toothpick inserted near the middle comes out dry. Allow the cake to cool completely before frosting.


So, take a break, eat some lunch or something while the remaining butter finishes softening...

... And now let's make the buttercream.

Beat the softened 5 tablespoons of butter with an electric mixer on medium speed until it's light and fluffy. Beat in the powdered sugar alternately with the coffee and milk. Beat in the vanilla. You can adjust the consistency by adding 1-2 teaspoons of milk.


This stuff is RIDICULOUS.

Spread it all over your cooled cake.


Garnish with mini chips, shaved chocolate, etc.... some pretty little chocolate crunch on top.


Ta-da! A coffee-lover's cake that's perfect for coffee drinkers and non-drinkers alike.


And I'm pretty sure it would go great with a cup of coffee.

Sunday, April 10, 2016

Lemon-Butter Shrimp & Linguine

When it comes to food, quite often, simpler means better. And that has never been more true.


I heard something the other day that made me immediately think of this recipe. Renowned restauranteur and Iron Chef Geoffrey Zakarian said, "When you have something simple and it tastes complex, that's when you've won." And this dish is definitely a winner.


So easy, and so quick - about 25 minutes is a small price to pay for a meal this delightful.

This is also a great time to learn about mise en place. Literally translated from the French, it means "putting in place" and is pronounced "MEEZ ahn plahs." In the culinary world, it refers to having all your ingredients out, prepped, and ready before you start cooking. Once you start melting the butter, this dish moves FAST, so you'll want to make the salads or garlic bread or side dishes before you start, as well as having your shrimp prepped.

A word about shrimp: I buy frozen shrimp that are raw, deveined, with tails on. You can certainly devein your own shrimp if you feel so inclined; I prefer to leave the removal of the shrimp's intestinal tract (read: poop) to professionals. I also don't like fighting with the tails on the plate (although they certainly look pretty), so I give each one a quick squeeze to remove the tail after thawing the shrimp. And finally, since we live FAR from an ocean, the shrimp at the seafood counter at the grocery store have already been frozen once to arrive safely in the middle of the continent. And those cost quite a bit more than the ones in the frozen food aisle. So, my recommendation: find a quality brand of raw frozen shrimp, and thaw them by placing them in a colander and running cool water over them for a few minutes. (And then squeeze those tails off, if you like.)


Now... let's get started.

Lemon-Butter Shrimp & Linguine
Adapted from damndelicious.net (One of my favorite blogs! Check it out!)
Serves: 4

You'll need:
8 oz linguine (or spaghetti)
2 T butter
1 lb medium or large shrimp, thawed and deveined
4 cloves garlic, minced
cayenne pepper, to taste
salt and pepper, to taste
1/4 c white wine*
1/4 c lemon juice
2 T chopped fresh parsley
1/4 c grated Parmesan cheese

*If you prefer not to cook with wine, chicken broth can be used as a nonalcoholic substitute. If you do choose to use wine, choose a dry white, like Pinot Grigio, Sauvignon Blanc, or Chardonnay, and enjoy a glass with your dinner. Or choose a nice dry rosé like this one that apparently pairs well with seafood.


If you missed last week's post about pasta, I'll include a brief summary on technique here: use a huge pot of water; salt the water copiously; undercook your pasta by a minute or two; drain it very briefly; and then place it directly into the pan of sauce, so it can finish cooking in the sauce and soak up the flavor.

So, in the context of this recipe: Bring a large pot of water to a full rolling boil. Meanwhile, make sure all your ingredients are at hand, parsley is chopped, Parmesan is grated, etc. Drop the pasta into the boiling, salted water and set the timer for 1-2 minutes LESS than the box recommends. When there's about 6 minutes left on the pasta, start melting the butter in a large sauté pan over medium heat.


Add the shrimp and garlic and then sprinkle the shrimp with salt, pepper, and a dash or two of cayenne.


Cook the shrimp for about 1 minute, flip them over, and cook about 1 minute more until they are opaque. I'm serious - if you've never cooked shrimp before, please trust me - they cook shockingly fast. And you really don't want overcooked, rubbery shrimp.


As soon as they're cooked through, add the wine and lemon juice and bring to a simmer.


About this time, your pasta should be done boiling. Drain it briefly and then dump it straight into the pan of shrimp, along with most of the parsley.


Stir to mix everything thoroughly and allow it to simmer for 1-2 minutes in the sauce.


Serve garnished with the Parmesan and additional parsley.


Simple, right?