Tuesday, March 29, 2016

Oven-Barbecued Chicken Thighs

Is there anyone out there who is not a fan of barbecue? I mean, really. Juicy meats smothered in sweet, smoky, spicy sauce is something I could dive into any time, any day of the year. 


And with this easy indoor recipe, you don't have to wait until summer rolls around (or even own a grill). You can achieve that sticky glaze right in the kitchen with a sauce that starts as store-bought, but gets a little extra love.


Oven-Barbecued Chicken Thighs
Adapted from the Pioneer Woman
Serves: 8

You'll need:
8 chicken thighs, bone in, skin on
olive or vegetable oil
1 1/2 cups barbecue sauce
1/4 c apricot preserves
2 cloves garlic, minced
hot sauce, to taste (I used about 2 teaspoons... I like it spicy.)

Preheat the oven to 400 degrees. Brush a rimmed baking sheet very lightly with oil, and place the chicken thighs skin-side down on the prepared pan.


Roast at 400 degrees for 25 minutes.

While the chicken is roasting, let's make the sauce. Put the purchased BBQ sauce (we love Sweet Baby Ray's) in a small sauce pan, and add the apricot preserves...


... garlic, and hot sauce.


Mix thoroughly and bring the sauce to a simmer over medium-low heat. Cook for a few minutes to soften the garlic, then remove from heat.


After 25 minutes, remove the chicken thighs from the oven. I know... they are not very pretty yet. Rather homely little birds.


Let's give them a makeover.

First, brush the exposed sides of the thighs with a generous amount of your BBQ sauce. HINT: Since the chicken may not be fully cooked at this point, dipping your brush in the pot of sauce, brushing the chicken, and putting it back in the pot could cause the sauce to be contaminated. Now, all the sauce that's on the chicken will be cooked, so that's not a concern, but any leftover sauce would have to be thrown out. And who wants to do that? So, take some sauce out of the pan and put it into a second bowl. Brush your chicken from that bowl, refilling as needed. That way, anything left in the pot can be safely stored in the fridge for another use. Hooray for not wasting delicious things.

Picking up where we left off: Brush the bottoms of the chicken thighs.


Then, using a thin spatula, gently flip over all the thighs, being careful not to rip the skin. This is why we oiled the pan!


Now brush the tops with that sauce.


Starting to get prettier. Return the pan to the oven and roast for 7 more minutes. Then pull them out and brush on another generous layer of sauce.


Roast for 7 more minutes. Remove from the oven and turn the heat up to 425 degrees while you slather them with another layer of sauce.


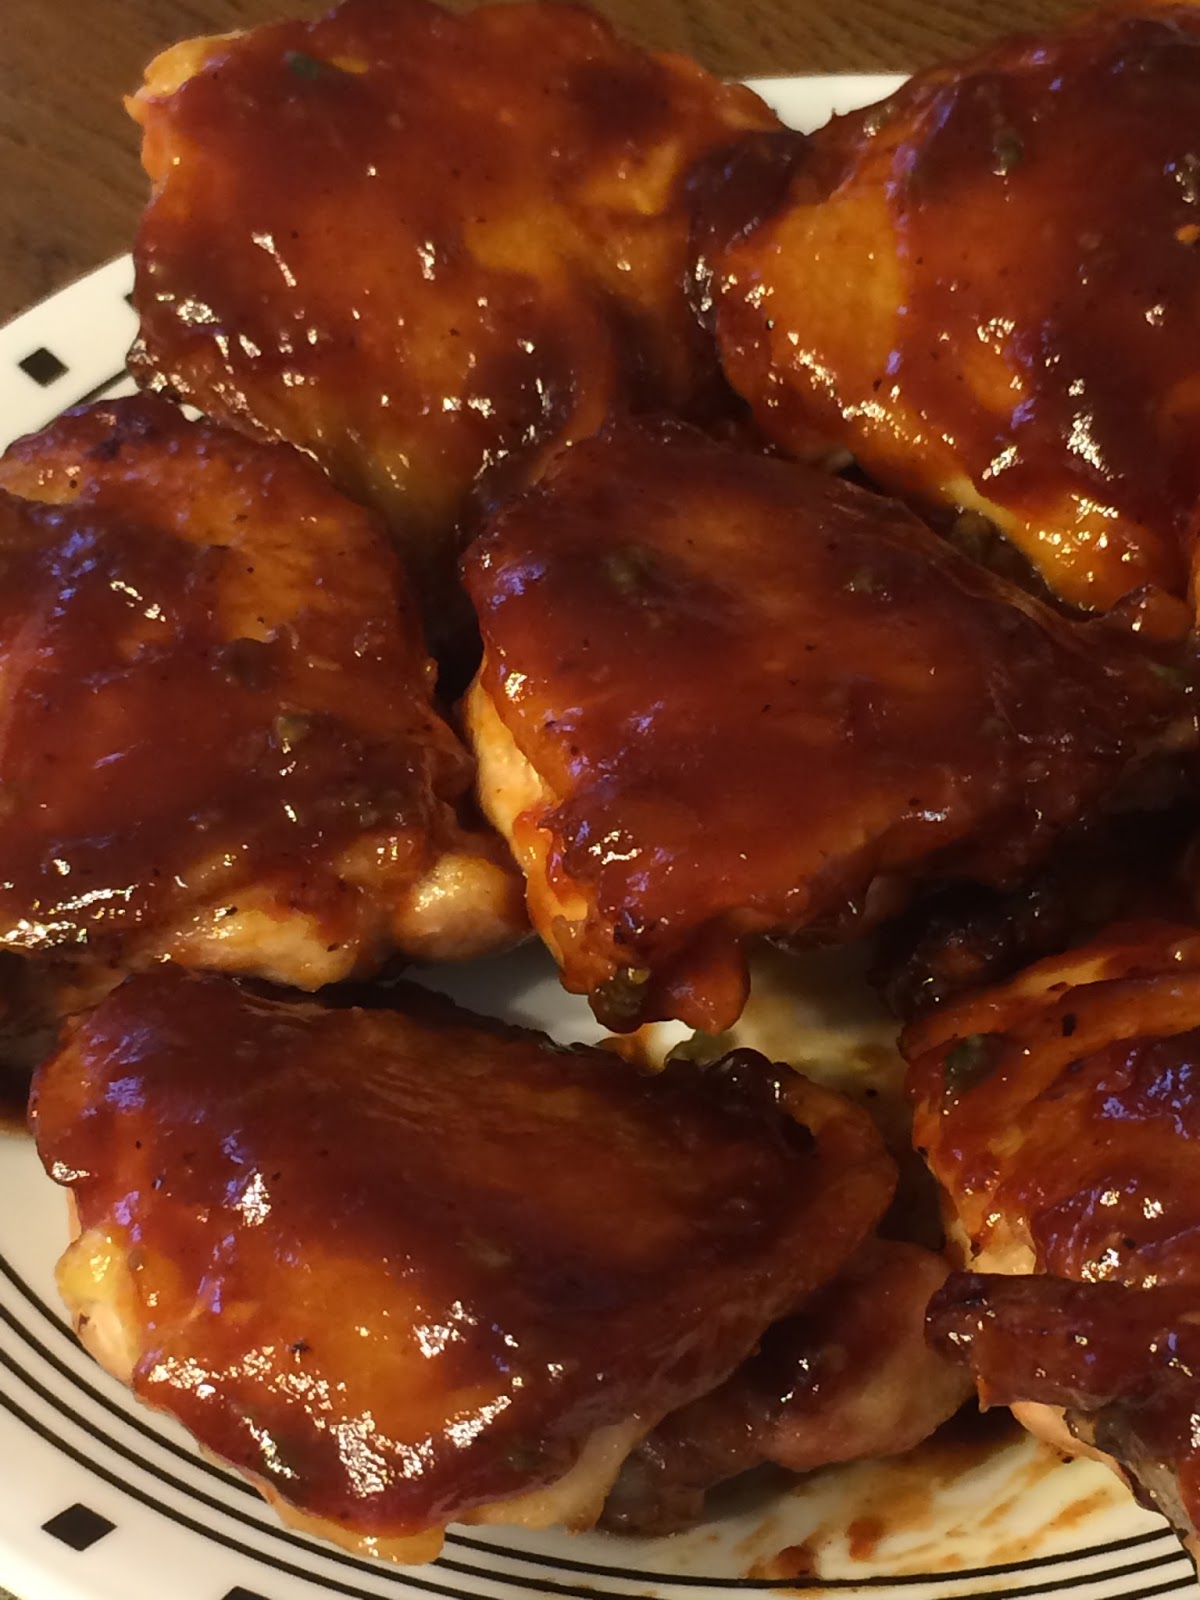
So beautiful. Roast for 5 more minutes at 425 degrees.


And... GORGEOUS.


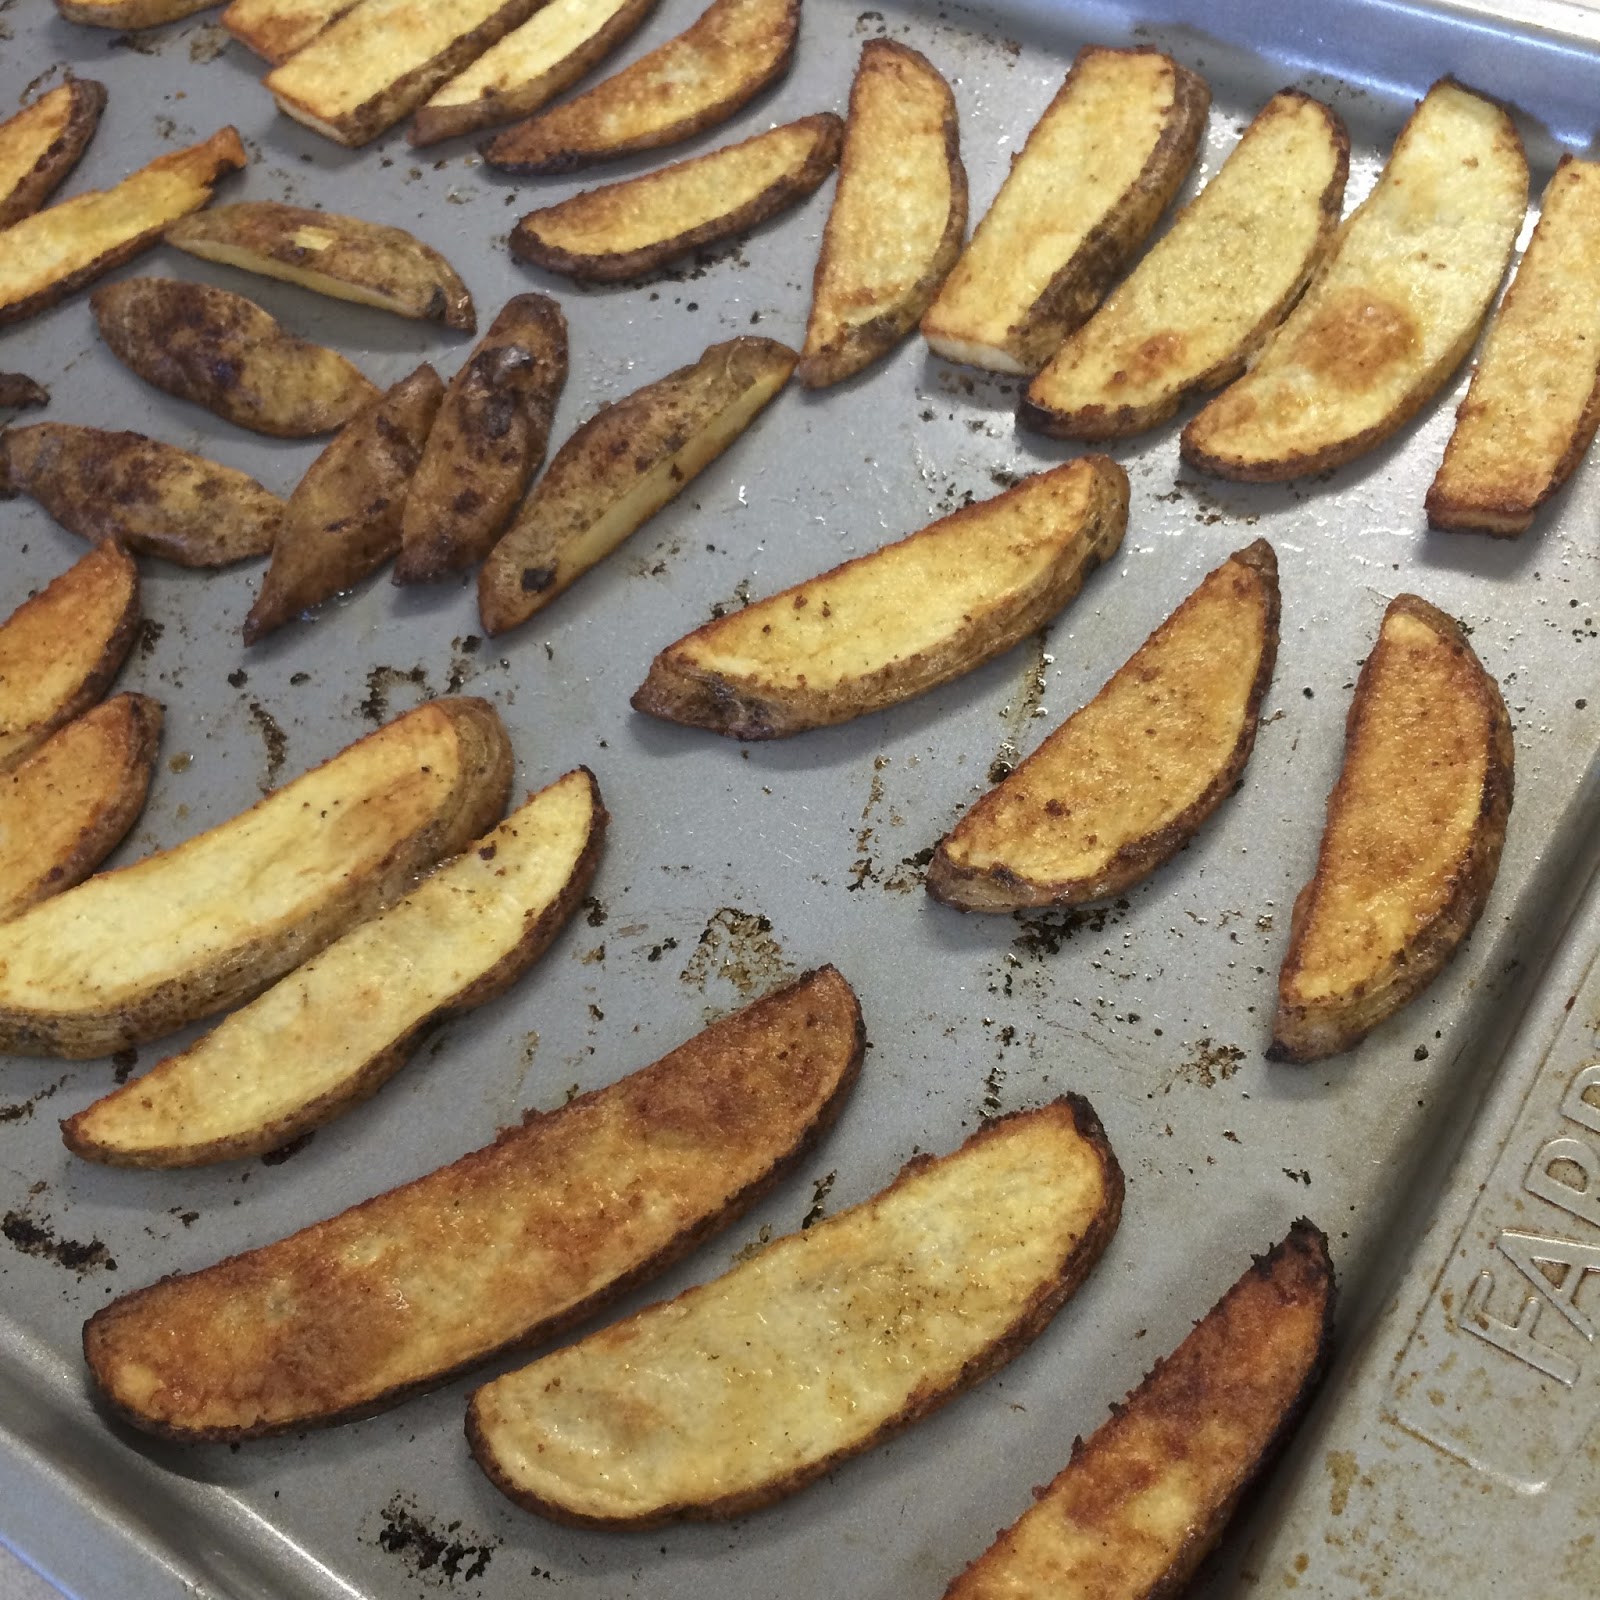
Serve with any and all country-cooking staples, like roasted veggies, cole slaw, cornbread, pasta salad, knives, forks, and possibly bibs.

Saturday, March 26, 2016

Cut-Out Cookies

Every family has its iconic recipes. Grandma's lasagna, Great Grandma's noodles & gravy, whatever the case may be: they become part of a family legacy, handed down to new generations, wrapped up in years' worth of wonderful memories. For me, this is one of those recipes. It was a true rite of passage for me when I could make sugar cookies just like my mom. This is another cookie that she always made at Christmastime, and every year, it just doesn't feel like December until I've had some homemade fudge and a sugar cookie. Year after year, my sisters and I got to help with rolling out the dough, cutting out the cookies with the cookie cutters, and decorating enough sugar cookies to feed the neighborhood. My mom, shuffling cookie sheets in and out of the oven. My sisters and I, arguing over the placement of the cookie cutters and sneaking bites of dough when my mom wasn't looking. (My dad, watching basketball.) And it's not just a matter of nostalgia; these are the best sugar cookies in existence. They are light, soft, and fluffy. And depending on what cookie cutters you own, there's absolutely no reason to wait until Christmas to make some. Case in point: I adore making these for Easter.


Delicious, bright, and festive. Simple and fun to make.


Sugar Cookies
From: My mom's sister's husband's mom... so, my aunt's mother-in-law, Mom Meyers
Yield: 80-100 cookies. This is not an exaggeration! Pictures above are of a half-recipe and there were 47 cookies. This is dependent on (a) the size of your cookie cutters and (b) how much dough never makes it to the oven...

You'll need:
2 c sugar
1 c shortening
2 eggs
1 c milk
1 tsp vanillla
1 t salt
1 t baking powder
1 t baking soda
5 c flour, plus LOTS more for rolling out the dough

Preheat the oven to 350 degrees. Cream the shortening and sugar.


It always makes me think of snow.

Beat in the eggs, milk, and vanilla.


Gradually add in all the dry ingredients, adding more flour if needed.


I usually end up adding more flour - at least half a cup more for a full recipe. It's one of those "you know when it looks and feels right" things. The dough should be stiff but sticky. Err on the side of not adding enough flour; you can always add more, and plenty more will get mixed in as you roll out the dough.

Put a big hunk of the dough (about 1/4 recipe) on a VERY WELL FLOURED surface.


Flour the top of the dough and your rolling pin, and gently roll it out to about 1/4" thickness or slightly thinner, always working outward from the center of the dough.


You'll know if you didn't add enough flour, because your dough will stick to everything. Flour your cookie cutters if you're using metal, and start cutting cookies. Use the dough as efficiently as possible, because every time you collect the scraps and roll them out again, you're adding more and more flour, and you can only do that so many times before the texture gets funny.


Put your cookies on an ungreased cookie sheet and bake one sheet at a time. How long you bake them is entirely dependent on the thickness and the size. If you have a mixture of small and large cookie cutters, put all large or all small on one cookie sheet and adjust your baking time. I rolled the dough to about 3/16"and used fairly large cookie cutters, and my cookies were done in 6 minutes. You'll know they're done when they look like this:


The tops are completely dry and the bottom edges are just turning golden brown. Doesn't that just make your mouth water? Don't over-bake them! The best part about these cookies is how soft they are; drying them out in the oven would be a crime. Remove them immediately to wire racks to cool.


Collect up all your scraps - and - EAT A BITE OF THE DOUGH. My mom would be scolding you about the dangers of eating raw cookie dough and food poisoning. However, I, who have never had food poisoning, have no qualms at all about telling you to eat some. This is the best raw cookie dough I've ever had, including chocolate chip. I usually end up dancing around my kitchen because it is just that good. But where were we?


Collect up all your scraps, grab another hunk of dough, smash them together with your hands, re-flour EVERYTHING, and do it all over again. Yes, it's a bit time-consuming, but if you're good at multi-tasking you can be filling one cookie sheet while the other is baking. Or - even better - you make these with your spouse, friends, or children, and split up the jobs. Roll up the scraps and cut, roll up the scraps and cut, roll up the scraps and cut, until you can't get any more cookies out of it.

Eat the rest of the dough.

When everything is baked and cooled, it's time to decorate. Some sugar cookies are loaded up with thick, heavy icing. However, all we ever put on these is a very, very simple glaze: powdered (confectioner's) sugar, water, and food coloring. (And sprinkles, just for fun.) If you have worked with powdered sugar before, you'll notice that it doesn't take much liquid to soak up about a cup of powdered sugar, so when you're mixing your icing, add the water - literally - a few drops at a time, or else you'll find yourself adding another cup of sugar to the bowl. (I do it every time.) Make it just stiff enough that it doesn't run off the cookies, and go to town.


Let the icing harden for a few hours before you pack them up. Put wax paper between the layers. These cookies stay soft and fresh for a very long time, which is a good thing since there will be so many. 

These are fun to cut out, fun to decorate, and even more fun to eat. I'm now teaching my own daughters how to ideally place cookie cutters and making sure they don't eat too much of the dough. I hope this recipe is something special for your family. And have a wonderful, happy, blessed Easter!

Thursday, March 24, 2016

Roasted Butternut Squash & Bacon Soup

Hi, I'm Melissa, and I have an addiction.

I'm addicted to roasting things.

It's true. I've spent the entire fall and winter playing "What can I roast next?" Because it is solid fact that every vegetable tastes better when it's tossed with the tiniest amount of oil, seasoned, and caramelized by roasting on high heat in the oven. Also works for meats and some fruits.

One of my other passions? Great soups. Especially the thick, hearty kind.


So when I saw a recipe for roasted butternut squash soup, it certainly caught my attention. 

And then... bacon.

Blended right into the soup. Smoky, bacony flavor in every bite. Because... bacon.

This is not a soup that requires 47 ingredients or multiple cooking techniques or even a lot of time. This is simplicity at its best.


These simple flavors, roasted and caramelized. It's irresistible, even if it's not strictly "soup weather." Which is good, since it is unseasonably warm for March. No matter. It's always time for bacon.

Roasted Butternut Squash and Bacon Soup
Adapted from damndelicious.net
Serves: 6

You'll need:
3 lb (roughly) of butternut squash 
1 onion
1 apple
4 strips of bacon
2 cloves of garlic
1/2 t dried thyme
salt & pepper
2 T olive oil
2 1/2 c chicken broth

Preheat the oven to 400 degrees while you prep your produce. Peel the squash, slice it, and cut into roughly 1-inch chunks.


If you're unfamiliar with butternut squash, you'll soon notice that the bulbous end has a mostly hollow interior with seeds and that goopy membrane stuff, similar to what you find in a pumpkin. Just like when you're making a jack-o-lantern, grab a spoon and scrape that stuff out.


Finish chopping the squash. Next, peel and core your apple, and cut into chunks of equal size to your squash.


Peel and roughly chop the onion. It is perfectly great if the layers stick together in a clump; individual pieces of onion would likely burn in the oven, so keeping these sections intact is actually helpful.


Finally, chop the raw bacon. I cut each strip into about 8 pieces. Don't dice it too finely, or it'll burn before the squash is cooked through.


Finally, mince your cloves of garlic, add the thyme, and salt and pepper to taste.


Drizzle the oil over everything and use your hands to mix thoroughly, making sure that everything is very lightly coated. Spread the mixture out in a single layer on two cookie sheets.


Roast everything for 25-30 minutes at 400 degrees, flipping with a spatula halfway through. Stab a few pieces of squash with a fork; if they're all soft, you're done.


Allow all that roasted deliciousness to cool for a few minutes, then transfer to the pitcher of a blender and add the chicken broth.


If you've got a big, powerful blender, you should be able to do the whole thing at once; if you have a smaller blender, start with half the roasted food and half the chicken broth and work in batches.

Puree everything until smooth.


Taste your soup and add salt and pepper, if necessary. You can also add more chicken broth to adjust the consistency. I like my soup very thick.


If you're eating the soup immediately, transfer to a saucepan to reheat.

Then serve up bowls of smoky, roasted fall flavor. (No matter what season it is.)


The original blogger recommends garnishing the soup with additional crisped and crumbled strips of bacon, as well as goat cheese and chives. Chopped up ham is great, because pork always calls for more pork. But my personal favorite? Feta cheese melting right into the soup.


Sunday, March 20, 2016

Buttercream Icing

This is the follow-up recipe to last week's chocolate buttercream icing. More real food, brought to you by a half-dozen ingredients and whipped together in about three minutes. 


This is no-fail, works-every-time, perfect-for-dying-and-frosting, eat-by-the-spoonful, real buttercream. 


You can dye the white frosting with traditional liquid drops to achieve beautiful pastel colors...


... or buy the food coloring gels for those intense primary colors.


Buttercream Decorating Icing
From: My mother-in-law, Carol
Makes: 3 c. (which is plenty to ice and decorate an entire cake. Carol also says that half a recipe will ice 24 cupcakes.)

You'll need:
1/2 c butter, softened
1/2 c shortening
1 t vanilla
1/8 t salt
1 lb (4 c) confectioner's (powdered) sugar
3 T milk

Cream the butter and shortening: beat them together on medium speed until well combined and fluffy. Add the vanilla and salt. Beat in the powdered sugar and milk and beat at high speed until the icing is light and fluffy.

And ta-da. Better living through real food. Now go eat your cake.


Friday, March 18, 2016

Oven Steak Fries

The word of the day: balance.


That is to say, the balance between using just enough fat on your potatoes that they're satisfying like traditional french fries, without the mess and hassle (and fat content) of deep-frying.

I have made some other oven-baked wedge fries in the past that were very "light," using only a little cooking spray and seasoning, and guess what? They tasted "light." Not satisfying.

These beauties are basically just roasted potatoes, but when they're cut like steak fries, and seasoned like steak fries, and taste like steak fries...


I'd call that the perfect balance.

A little butter, a little oil. No deep frying. Just satisfying French fry flavor. Enjoy.

Bonus: They cook for less than 30 minutes... pretty fast for a potato dish!

Seasoned Oven Fries
From: Simple & Delicious Magazine
Serves: 4-6

You'll need:
6 medium baking potatoes (or more smaller ones)
2 T butter, melted
2 T canola or vegetable oil
1-2 t seasoned salt (I use Lawry's)


Preheat your oven to 450 degrees.

Cut each potato lengthwise in half, and then cut each half into 6-8 steak fries, about 1/4" thick.


Throw them all in a large bowl. Pour the melted butter and oil over the potatoes....


... and add the seasoned salt.


As with any type of roasted veggies, I like to use my hands to stir them up and make sure every piece is lightly coated. Then spread out your fries in a single layer on a cookie sheet or two. If your pans don't have a good nonstick finish, you may want to lightly grease them.


Bake for 12-14 minutes, until the bottom sides are just starting to get brown, and flip all the fries.


Bake for 10-12 minutes more, until they're all brown and crispy. Top with more seasoned salt, if you like, and serve with plenty of ketchup.